
Hello Salesforce Thinkers, In our previous blog we learned about Sorting Picklist values into alphabetical order in this blog we are going to learn “Salesforce Schema Builder ”.

Schema builder is a tool that lets us visualize and edit our data model. With the use of schema builder we can design data model with existing objects by simply dragging and dropping.
Schema Builder shows all details such as the field values, Data Types, required fields, and the relation between objects by displaying lookup and master–detail relationships.
The drag-and-drop interface lets us easily add a custom object or new field, and saves the layout of our schema any time we move an object. We can view the details for both standard and custom objects in Schema Builder. It is helpful to explain the way data flows throughout our system.
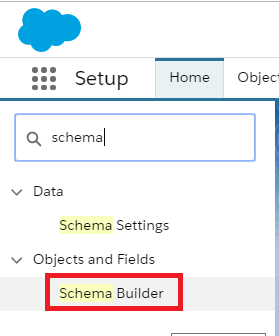
How to Access Schema Builder?
Setup >> Enter Schema Builder in quick search box. >> and Click on Schema Builder.
In the left panel, click Clear All.
From the Objects Palette select the Objects. For example here we are taking Account, Contact and Opportunity.

As shown above we have three standard objects and they have some relationships with each other. We can move object to any place in Schema Builder.
Blue connections are lookup relationship and red connections are master detail relationship.
Tabs In Schema Builder:-
Here are some options available in scheme builder.
Auto layout, View Options, Elements and Objects.

Auto-Layout : Used to sort the layout of the Objects. Click on auto layout and zoom out to display schema builder clearly.
View Options: In this option we have three filters as Display Element Names, Hide Relationships, Hide Legend.
Elements: This tab displays all objects, fields, relationships on sidebar as drop down.
Objects: Here we have a drop down having options as selected, standard, custom and system objects. We can Select filter according to our requirement.
Now we will select the objects and move them to any space on the canvas.
The layout will automatically save whenever you move the object.
Create objects using Schema Builder:-
To create objects and fields go to Elements tab, Just drag the object element to create new object. It prompts you to fill in the details of the object. Fill the detail.

Click on Save.
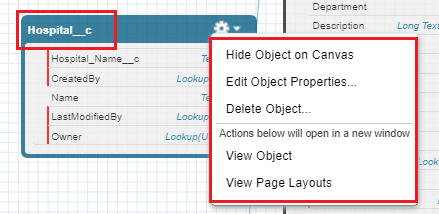
From this drop down we can Hide Object on Canvas, Edit Object Properties ,Delete object and view Object and its Page Layouts.
Create fields using Schema Builder:-
To Create a field go to Elements tab, choose a field type and drag it onto the object you just created. Fill out the details about your new field.
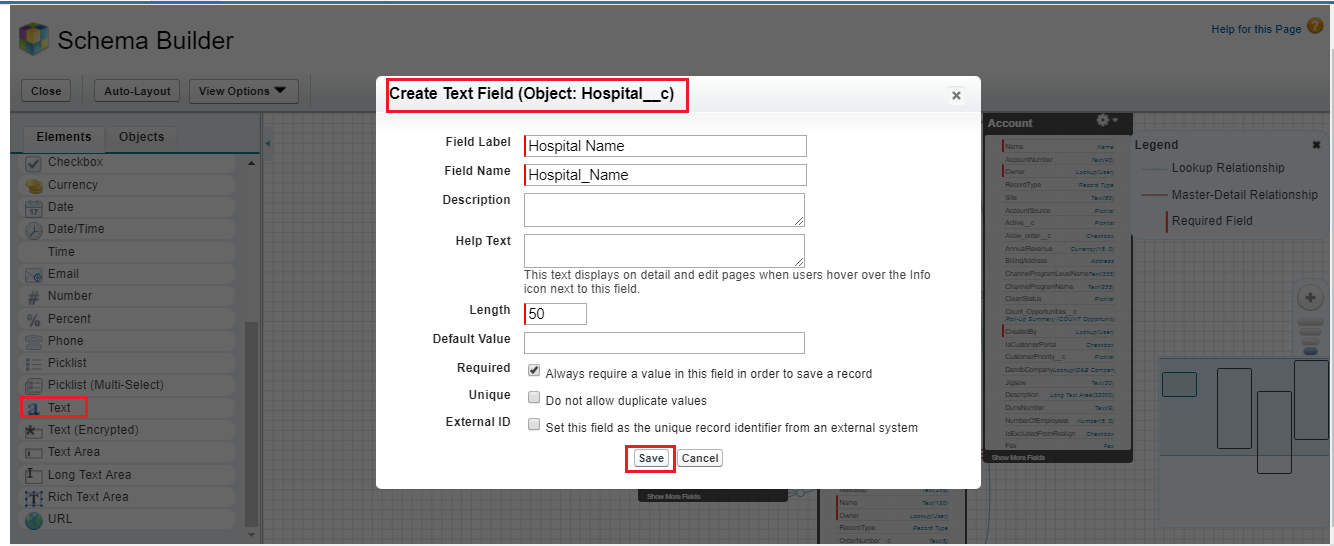
Click Save.

View Field in New Window: To view the details of a field in a new window, right-click the element name or label and select View Field in New Window.
Edit Field Properties : To edit properties of a custom field, right-click the element name or label and select Edit Field Properties.
Manage the permissions: To manage the permissions for our custom fields directly in Schema Builder right-click the field name and click Manage Field Permissions.
Any field that we add through Schema Builder isn’t automatically added to the page layout. we need to edit the page layout to specify where the field should be displayed.
Thank you for reading this blog, hope it is helpful.
